Showing posts with label Shelter Kit. Show all posts

Sunday, October 27, 2013

Insulation in Kneewalls

Kneewalls are a challenging part of a home because they are a little bit hard to build and insulate. We chose kneewalls because of the expanded space and better, though challenging, insulation.

Here is a drawing from Shelter Kit showing the kneewall extension. So rather than having the rafters meet the floor joists directly, there is a extension of the wall that supports the rafters. This gives you more usable space.

Kneewall End View
Shelter Kit - Drawing of Kneewall 
The next drawing shows the increase in space in the upstairs with kneewalls.

Kneewell Side
Comparison of space with and without kneewalls

The difficulty arises with the funky cavities made by these kneewalls. How do you insulate this space?


Dormer framing with wall framing behind it

I posted a question on Green Building Advisor about it because I just didn't think the insulation company would be able to blow-in cellulose effectively in these spots. I decided to fill them with Roxul mineral wool insulation and then I'll cover that with the Intello Plus smart vapor barrier. Then we will insulate with the cellulose over that. Does that seem like a lot of insulation for this area? Well, it is, but this is what I call "a vulnerable area" a seam between sections of the house (the roof, the wall and the rim joist below) that is very prone to air leakage. 

Also the details of adding exterior insulation to this short section of wall would have been very challenging. So we omitted it from this section of wall. And we built this wall before I started going crazy about air sealing so the inside of this cavity is not air-sealed as almost every other cavity in the house is. The outside is taped though. 

Now you can see my efforts at insulating the kneewalls. This might not meet Grade 1 insulation standard, but the voids are filled. Remember that there will be at least 5 inches of cellulose interior to this insulation to make sure the wall is well insulated.

Intello Plus membrane will be stapled between the Roxul mineral wool insulation and the dormer wall framing in front. That space will be filled with dense-packed cellulose.


Bedroom kneewall stuffed with Roxul mineral wool insulation.

Tuesday, July 30, 2013

Almost Dry!

Carlton and Chris and Myron have been working really hard and have the house almost completely covered with the roof. It is very exciting. I love the framing stage.

Back porch and back dormer

View from the driveway


Front view

Saturday, July 27, 2013

Porches are framed

The guys have been working really hard and have framed all the porches. We are going to use the porch roofs to help get the roof sheathing on. The roof pitch is kind of steep. It's a 12:12 pitch which means that for every foot out you go, it goes up 1 foot. This is not really a typical pitch in the Southeast. It is more common for areas with a significant snow load. Since the kit is from New Hampshire, that's why it's so steep. The steep roof pitch does make for a very attractive house shape though.

So since the porch roof pitch is much shallower, you can stand on it to get the plywood sheathing on the main roof. It makes it much easier.

Windows have been ordered.

I have not ordered the Roxul insulation yet. I need to figure out surface area of the house so I can get an accurate estimate of how much I need and can compare prices.

John and I went to the bank to apply for the construction loan on Friday. I have a whole list of things I need to get to them to help our application go through:

1. Current photos of the house - where we are in the construction process
2. A "Spec sheet" - what goes in the house such as flooring, trim, countertops, siding, metal roof, etc. This list is supposed to be very specific. Randy is going to send me a sheet so I can see what all is included and modify it.
3. Paid invoice of the cost of the kit from Shelter Kit
4. Description of the "green" features of the house
5. Floodplain information

Here's where we are as of Friday:


The porch roof sheathing is not on yet; hence, the tarps. We continue to have record-breaking rain here - as in more rain than has EVER been recorded in July.

Friday, July 19, 2013

Framing of the New House Continues - Second Floor

Here are the guys setting the first ridge board. First they build the scaffolding and the temporary braces, then set the ridge board in place. I think that happened on Tuesday of this week.


Rafters will hold the ridge board in place after the temporary braces are removed.


Ceiling joists have been added to the rafters. Also the front dormer has been framed (after some trial and error because I couldn't tell left from right on the plans.)


Back dormer is framed. Also the gable end framing is in place.


You can see the front dormer better here.


Another view of the back dormer.


John and I hope to frame the downstairs walls this weekend. I need to treat the wood with BoraCare, a boric acid based termite preventative. Then I need to use my Prosoco Joint and Seam filler to seal some the seams before we go any further.

Saturday, July 13, 2013

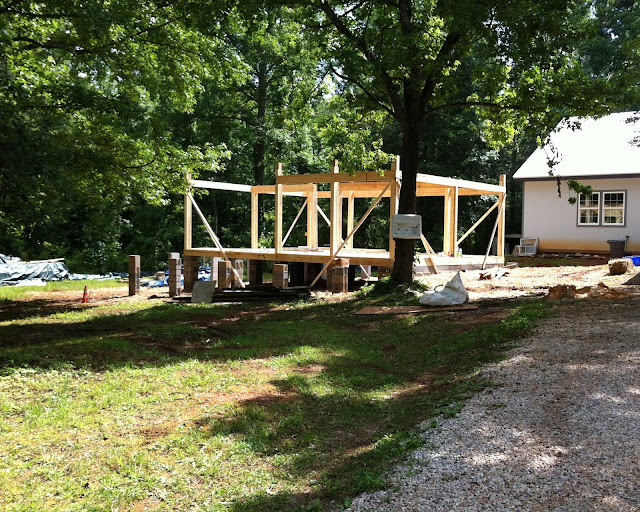
Lots going on - Posts in

Work on the house is going well. It is really beautiful in the framing stage. This is a post and beam house which means that the weight of the house is borne by the posts and beams rather than through a series of studs. It is critical to get the framing right which is what Carlton and Chris have been doing. Chris, you may recall, worked with Carlton on my house when I had the exterior insulation applied, but during the building downturn he got a regular job with regular hours rather than building houses. He had a 2 week period off around the July 4th and kindly agreed to help Carlton with the framing of John's house. You can tell Carlton was very happy to have Chris help him with the house.

This is how the house has been progressing despite daily rain:

Foundation footings


Piers installed

Floor framing

Installation of the posts


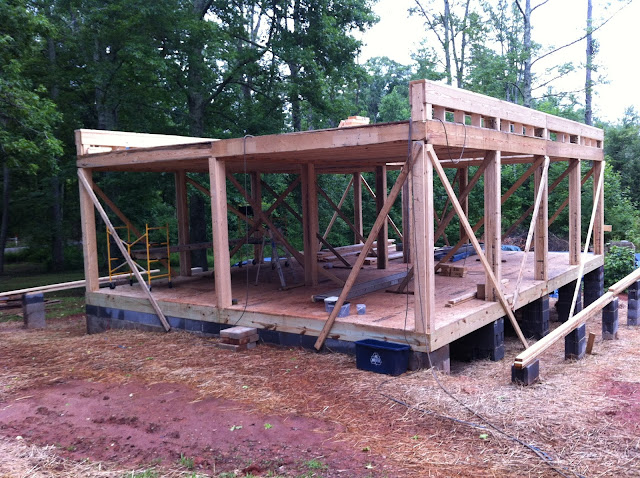
Second floor joists


Joist hangers (I actually installed some.)


Upper floor and kneewalls installed


Next week rafters!!

Tuesday, April 16, 2013

John's New House

The Shelter Kit arrived today. It was eventful to say the least. My oldest brother rented an all terrain forklift to unload the truck. Just because it has big knobby tires and weighs several tons doesn't mean it can't get stuck. We got it stuck on the very first load. One tire was in the mud up to the axle with a full load of wood on top. A nightmare. We had to call a wrecker to pull it out. The load was too heavy for his truck so he had to anchor his truck to a tree to pull the forklift out. Once his truck was anchored, then the forklift was pulled from the muck pretty easily. I did not take a photo of the stuck forklift because I was pretty distressed. I should have because now we may be able to laugh about it.

The excitement did not end with the stuck forklift however. 2 loads fell from the forklift but I don't think any wood was damaged.

Here are some views of John's house in its current state.


You can see one of the dumped loads near the road. We had to load it on the forklift by hand.
So there has been some movement in the getting ready to build. At least we are going forward. I am already sore.

Thursday, February 7, 2013

Challenges in Designing an Energy Efficient Home - on vacation at Big Sky Montana

My family and I are on vacation in Montana. Most of the family is skiing, but my knees are being troublesome so I have only skied a minimal amount for 2 days.

Randy, my trusty contractor and good family friend, says  "Next year I’ll be hosting Randy’s Ski Training camp. We can do it in John’s shop. I’ll crank up the music and we’ll all do Hindu squats, power skips, jump rope, planks, roll outs, and turbo lunges just to name a few! Skiing is serious fun and it requires serious prep." 

One advantage of being a little gimpy, though, is that we actually have made some strides in designing John's home. You may recall that we are buying a kit from Shelter Kit which is basically the shell of the home. My motivation for doing that is twofold, I want to actually use a hammer and have sweat equity in the home and the second reason is that I feel like we can control the quality better if I am involved daily.


I've been a paying member of Green Building Advisor for 3.5 years. I have subscribed to both the Journal of Light Construction and Fine Homebuilding for several years. In that time I have worked hard to understand principles of building science and develop ideas on how I would want to build an energy efficient home. I've learned the importance of air sealing, vapor control, methods of insulating a home, ideas about heating and cooling a home. As a result of this study, I think I need to be onsite during the building to make sure the home is done the way I want it to be. That's a little more detailed explanation of why I want to use a kit to build the home.


Anyway, we've got most of the layout done. My brother John has an old student version of AutoCAD which we used to draw up the plans. 


This is the first floor. We are trying to group the plumbing in one corner to minimize penetrations in the roof with plumbing stacks and to simplify the plumbing. The front porch is enclosed and will be the "Cat Porch". The kitchen is to your right as you enter from the Cat Porch. On the other side of the wall from the kitchen is the downstairs bathroom. On the other side of the wall from bathroom is the laundry/utility room. 
Upstairs with full bathroom and 2 bedrooms. The house is not really a 2 story house . It is more like a  1 1/2 story Cape Cod with a 10' shed dormer to fit the bathroom better. What is drawn as the sides of the bedrooms along the long axis of the room is the 5' line. These areas may be open or they may be enclosed for storage. John could line the rooms with drawers and cabinets for a really clean look. 
I've asked Randy and the kind people at Shelter Kit to look at the plans to see if they can see ways to simplify the plumbing and for advice on window sizes and placement. Or if they see glaring problems that we have overlooked. It's not like we have the code memorized.

Carlton, our carpenter, is recovering from his horrible accident last fall where John's old pool house came down on him and he broke his right lower leg in several places (and ribs and a vertebra or two). He has pain and limps a little bit, but he is getting back slowly. He has been helping out with the plans. He researched to find out if we could use John's septic tank or did we have to install a sewer line. Thanks to Carlton's homework, we get to use the septic tank saving probably $10,000!! Whew. That is a relief. 

Another great thing about Carlton is that he knows people where you get building permits. So we have an inside connection.

So even on vacation in the beautiful state of Montana we are getting stuff done on the house.

Monday, January 21, 2013

Challenges in Designing an Energy Efficient Home - Roof Details

I am trying to visualize the details for applying exterior insulation on the roof in my head all the time. Sometimes I have an Aha! moment and think I have it solved. And then realize what a pain it would be to execute while you are on a roof or scaffolding 20 feet in the air.

First a little bit about roof anatomy. This photo is borrowed from www.hometips.com.


This diagram shows several different kinds of roofs - a hip roof,  a regular gable roof with a doghouse dormer on it. We will have a simpler roof than the example above.
Simpler gable roof from a different website - Container Home Consultants


Ok, so the terms we need to know to talk about a gable roof for the purposes of this discussion are eaves, rakes, rafters, and rafter tails.

The eaves are the part of the gable roof that are horizontal. They are lowest part of the roof and serve to allow water to run off the roof without draining directly on the siding.

The gable end or rake end is the sloped end of the roof over the wall. It is usually extended to prevent rain from running down the siding as well. In heavy snow load areas, eaves and rakes do not usually extend as much as they do in the south because the snow can be so heavy and can mass on these areas causing ice dams, etc. Not a problem here. We need eave and rake overhangs to block the rain and the summer sun.

The eaves are usually formed from rafter tails, extensions of the rafters themselves.

The problem with the eaves and gable overhangs in the design of John's house is that there is no attic in John's house so the rafters themselves form the base of ceiling inside the house. The area between the rafters will be filled with dense pack cellulose just like the walls. Thermal bridging raises its ugly head once again. If the rafter tails protrude outside the thermal envelope they will conduct heat out of the house (or in summer heat INTO the house). So the issue is how to make overhangs that will not violate the thermal envelope. It's not easy.

The other issue about the rafter tails is that it is difficult to air seal around them. If your house is a simple gable shape as shown below, you can much more easily air seal around the exterior of the house than if you have rafter tails protruding.


Drawing borrowed from 2009 Solar Decathlon Gable House designed by students from the University of Illinois


One of the guys at Shelter Kit where we are buying the house kit from, suggested that this would not be a big issue in our part of the country since we are in a cooling dominated environment. I know that is true, but I still think it is important to consider these details and try to minimize the thermal bridging as much as possible.

Here is the latest drawing. (Please note: It is hard for me to draw overlapping wood 2 x 4s in 2-D). The top drawing shows the roof with plywood sheathing with parallel 2 x 4s that form the overhangs on the eave side of the roof. The bottom drawing shows a cross-section of the layers of the roof.


The roof itself is a simple rectangle covered with 1 inch of foam that has 2 x 4s standing up forming the rafter tails. 2 x 4s are nailed to the rafters below, but are separated by an inch of foam. The only penetration of the thermal envelope is the nails or screws holding the 2 x 4s in place. The area between the 2 x4s is covered with either foam insulation or Roxul mineral wool insulation. If you want to get really fancy (and you have a lot of money) you can add another layer of insulation over the 2 x 4s, before you add the last layer of sheathing, then the metal roof.

The rafter tails along the eaves can be covered with siding underneath when the siding is applied.

To make gable end overhangs, a ladder-like extension could be attached to the 2 x 4 near the gable edge of the roof and could extend past the roof-wall intersection by 8-12 inches. We don't need a wide overhang because of the porches around 3 sides of the house.

This design is complicated, but less so than some of the ones have seen on my favorite websites - Green Building Advisor, Fine Homebuilding and Journal of Light Construction. I do have to run it by some real builders though. I'll let you know.